Printable Chevron Halloween Pinwheels with a Fun Place Card Idea and a Cute Holiday Banner
Can you believe Halloween is this Friday? Today I'll be putting the finishing touches on my daughter's costumes with my mom. Our older girl will be Elsa and my mom has made her the most amazing sparkly blue cape to go with her dress. Our youngest girl will be Olaf and I've got the soft white leggings and white tutu with a white long sleeve onesie. Just need to use fabric paint in brown for the sleeves and then add the coal buttons. They are going to look ADORABLE!!!! But, moving onto today's fun DIY post . . . I have some great Halloween printables for last minute decorations and cute surprises for your little ones. How about surprising your kids with their very own little jar of sweets? It can be filled with something edible or non-edible . . . maybe a jar of creepy crawlers - the plastic kind of course. These DIY Pinwheels are available in 11 other color choices - but I chose the black pattern as I loved how it looked on both white and orange paper for Halloween. These paper pinwheels are from You Make Do™ and are available for purchase as a download for just $1.96. They are easy to customize with the color paper of your choice and would also make cute pinwheels on their own for school classes - maybe homeroom moms would like this idea :)
To make these pinwheels you will need the following:
- card stock paper of your color choice
- a printer {these were printed on an Epson XP-950}
- scissors or an Xacto knife
- brass fasteners to hold the pinwheel together
- plastic spiders from the $1 store
- paper straws
- hole punch
- hot glue to adhere the spiders to the pinwheels
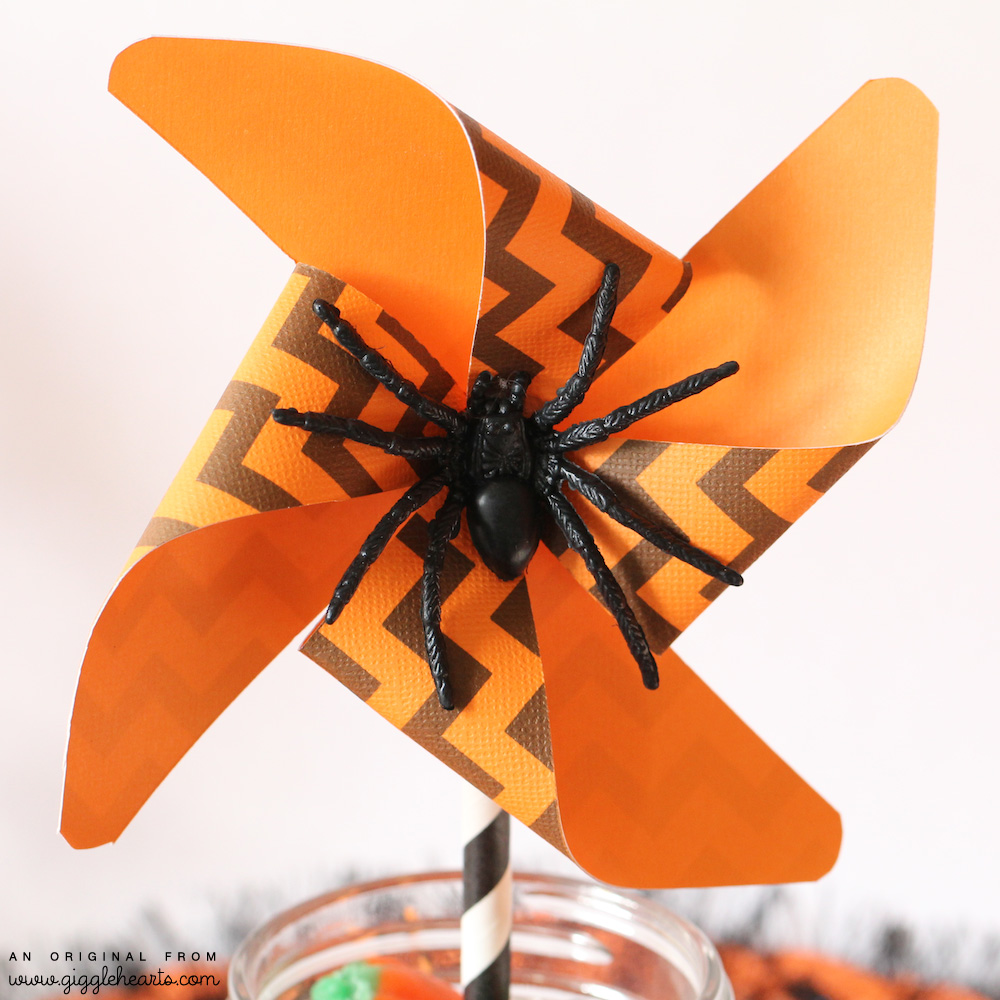
Once you have the pinwheels printed, you will follow the guidelines for cutting them out and then you can either fold inwards or backwards to make a the pattern you prefer. MY PERSONAL TIP: I used a small hole punch for the tips of the pinwheel, and then just made a small slit in the center for the brass fastener to go thru. I then flattened the tip of the paper straw, added a hole punch and hooked to the back of the pinwheel with the brass fastener. I then hot glued on the spiders.
PS: The Happy Halloween banner you see was from You Make Do™ and was the perfectly fun extra decoration to celebrate the holiday with. I printed mine on orange paper so the letters would be colored on the black background and used my 2 inch circular paper punch to cut them out. Now, that I've taken the photos, the banner is now hanging on the mirror over our decorated mantle in the living room. The gift/name tags hanging on the jars were the bonus circles from the garland.